How I made: Stylized Heightmaps pt. 1
I’m going to be using the Java version of Processing, but feel free to use whatever you prefer. The same principles will apply.
What are heightmaps?
A heightmap is a raster image or more generally a grid that contains elevation data. Each value in the grid stores the height of the particular location. It’s usually visualized as a grayscale image, with black being the minimum height, and white the maximum.
We’re not, however, going to be generating a grayscale image, but rather render a stylized version of that heightmap. Something that looks like this:

Before we dive in, I’d like to say that this has been inspired by the incredible work of Matt DesLauriers.
Go check him out!
Making a mesh
First we’re going to try and create a mesh, which we can then edit to render our heightmap.
A polygon mesh usually consists of triangles, and that’s what we’re going to use.
import peasy.*;

// Camera to be able to move around. (http://mrfeinberg.com/peasycam/)
PeasyCam cam;

// The size of the grid in units. This can be broken into x-axis and y-axis size
// but we're going to make a square grid for simplicity.
int gridSize = 1000;

// How many points we're going to have within the size of 1000 units.
int gridResolution = 100;

// The margin between each point in the grid. gridSize / gridResolution
float gridMargin = gridSize / gridResolution;

color background = color(64, 73, 132);
color surface = color(10, 10, 10);

void setup() {
  // We're going to use the P3D renderer.
  size(1000,1000, P3D);
  background(0);
  stroke(255);
  fill(200);
  cam = new PeasyCam(this,gridSize/2,gridSize/2, 0, 800);
}

void draw() {
  background(0);
  drawMesh();
}
And the basic setup is done. We have our important values set and a camera to move around. All we need is to actually render the triangles.
void drawMesh() {
  // We're going up until -1 on the y-axis since
  // for each row we're drawing the next row's vertex as well.
  for(int i=0;i<gridResolution - 1;i++) {
    beginShape(TRIANGLE_STRIP);
    for (int j=0;j<gridResolution;j++) {
      // The x and y coordinates of the point we're drawing.
      float x = j * gridMargin;
      float y = i * gridMargin;
      // The y coordinate of the point on the next row.
      float y2 = (i+1) * gridMargin;
      // 0 for now, we're going to set it later!
      float z = 0;

      vertex(x, y, z);
      vertex(x, y2, z);
    }
    endShape();
  }
}
Since we’re drawing triangles we need to specify 3 vertices at a time.
beginShape(TRIANGLE_STRIP); does exactly that. Every three vertices that are specified it draws a triangle.
In each j loop we’re specifying the first two vertices: The current one (x, y) & the one in the next row (x, y + 1).
After the first loop is complete and we proceed to the second loop, a third vertex is specified (x + 1, y).
This finalizes the first triangle and reuses the last vertex for the next one.
Let’s try running it. It should look something like this:
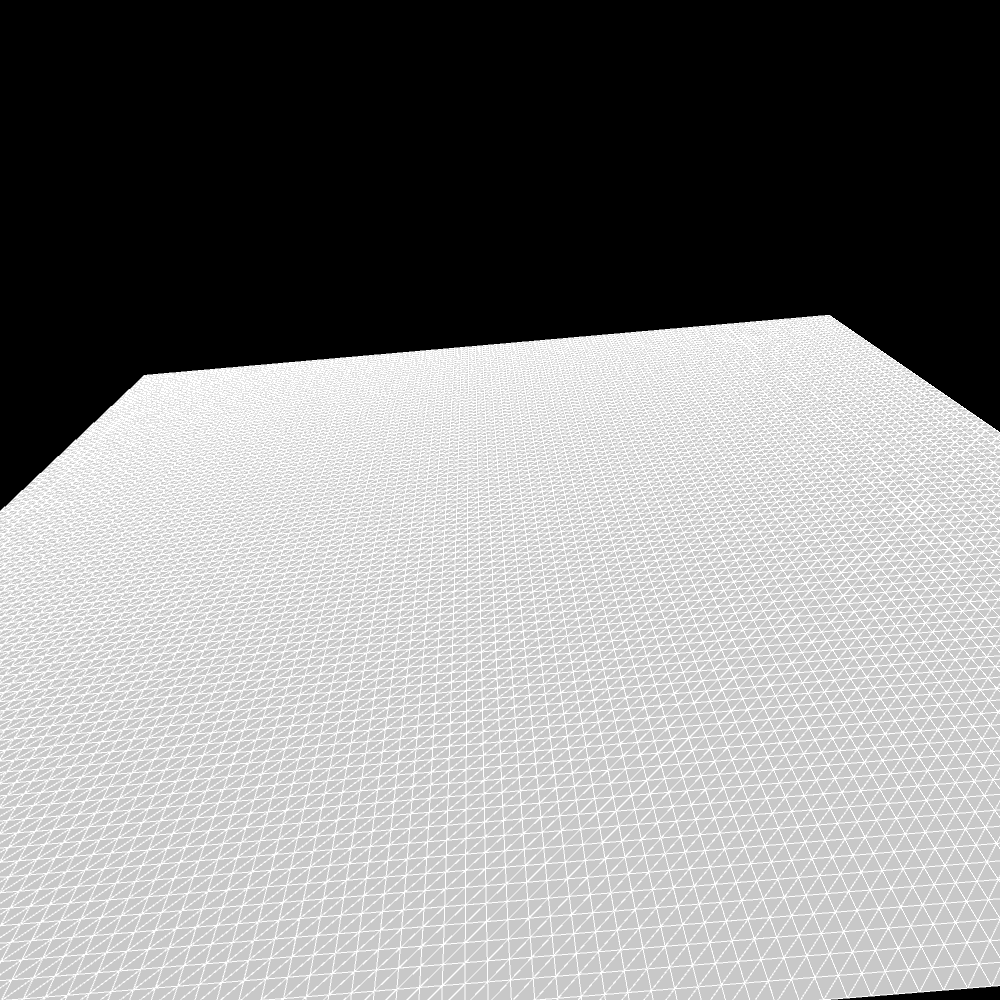
Feel free to play around with the grid size and grid resolution.
Making it interesting
Our mesh is working fine. But we need to make it a little bit more interesting.
Let’s start off easy by giving it completely random values.
First let’s create an array to hold the values of the elevation.
// Array to hold elevation values.
float[][] elevation = new float[gridResolution][gridResolution];
We’re also going to create a function to populate the array, and call it inside setup().
void getHeightMap() {
  for(int i=0;i<gridResolution;i++) {
    for (int j=0;j<gridResolution;j++) {
      float z = random(0, 100);
      elevation[i][j] = z;
    }
  }
}
We’re just iterating through the array and assigning a random value between 0 and 100.
Now back inside drawMesh() we should assign the new values.
We’re also going to need a z2 to get the value for the vertex on the next row.
float z = elevation[i][j];
// Don't forget
float z2 = elevation[i+1][j];

vertex(x, y, z);
vertex(x, y2, z2);
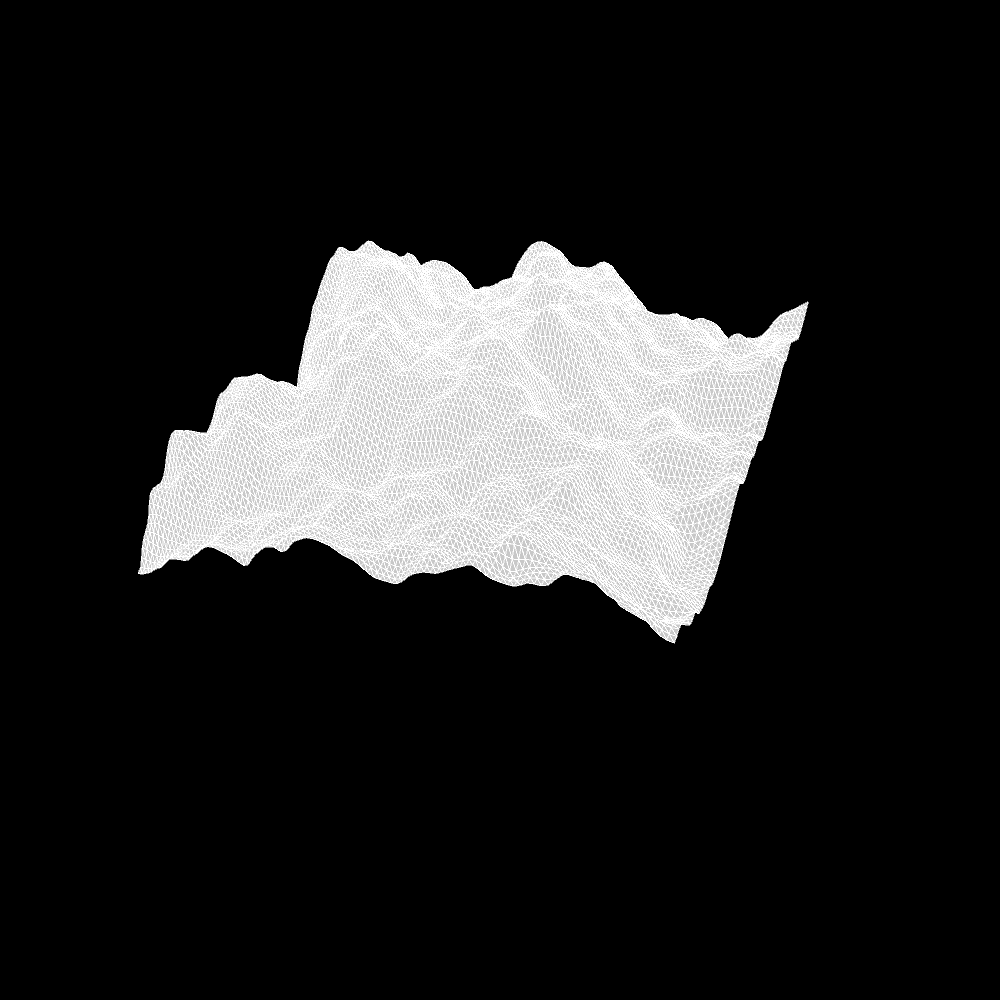
It should now look something like this:
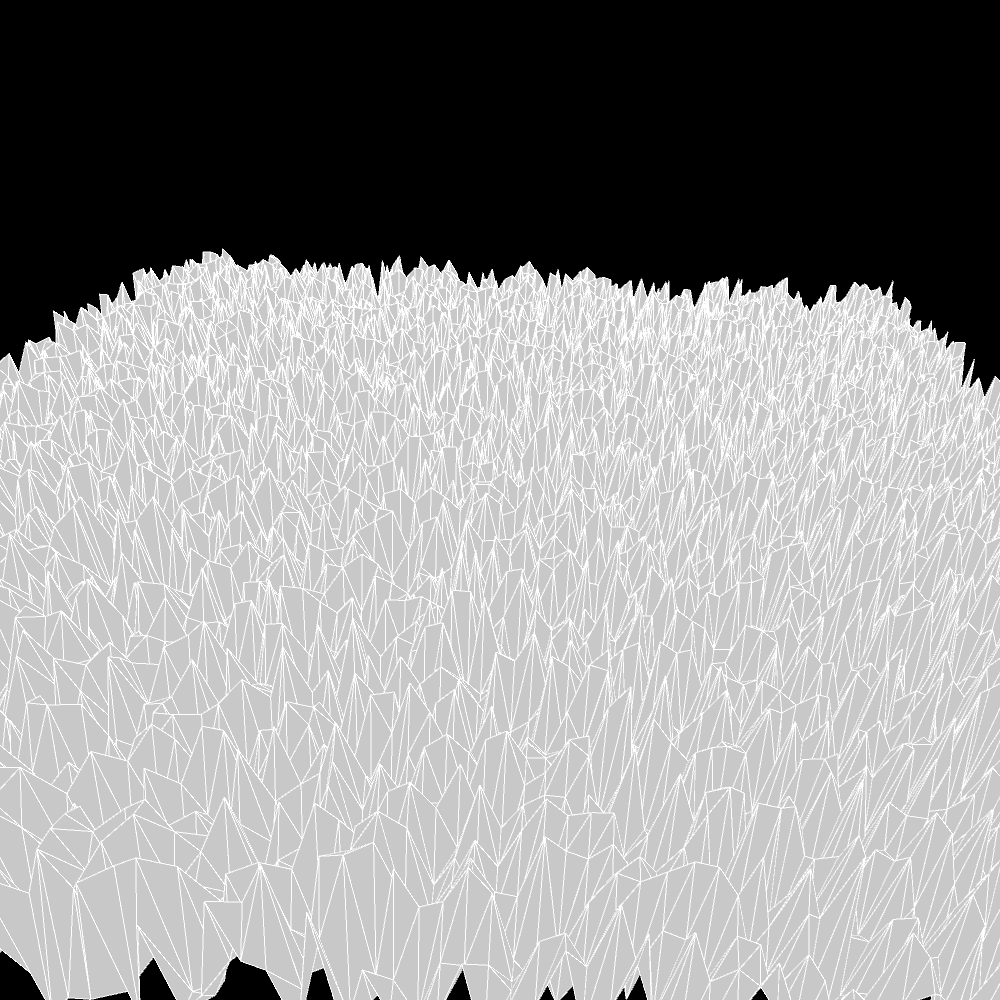
VERY jagged!
Even if we reduce the elevation a little bit by generating numbers between a smaller range (say 0 to 20), it’s still going to look VERY random.
And that’s completely fine, if that’s the style you’re going after.
But we’re going to try and create something a little bit more interesting. But first we need noise.
Perlin Noise
Noise in general is a fairly complex subject but we’re going to keep it simple here. If you want to learn more about perlin noise and why we prefer it over random in this case, I recommend watching this amazing playlist by Daniel Shiffman over at Coding Train.
In short, perlin noise is a type of gradient noise. That means that adjacent points have similar values with smooth transitions. There are no abrupt, big jumps between values. This in turn will create a heightmap that’s a lot more familiar to us.
Perlin noise can be accessed using the noise() function in processing, but we can also use Open Simplex Noise (I’m using K.jpg’s implementation in Java).
BACK TO OUR PROGRAM
We’re going to replace random() with noise() inside our getHeightmap() function.
noise() takes slightly different arguments. Since we want a 2D noise, we’re going to provide an x and a y offset.
We also need to scale the result by a number since it’s always a number between 0 and 1.
void getHeightmap() {
  for(int i=0;i<gridResolution;i++) {
    for (int j=0;j<gridResolution;j++) {
      // maxHeight is the scaling value (maxHeight = 100)
      // (for maximum noise (=1), z is going to be equal to max height).
      float z = noise(j, i) * maxHeight;
      elevation[i][j] = z;
    }
  }
}
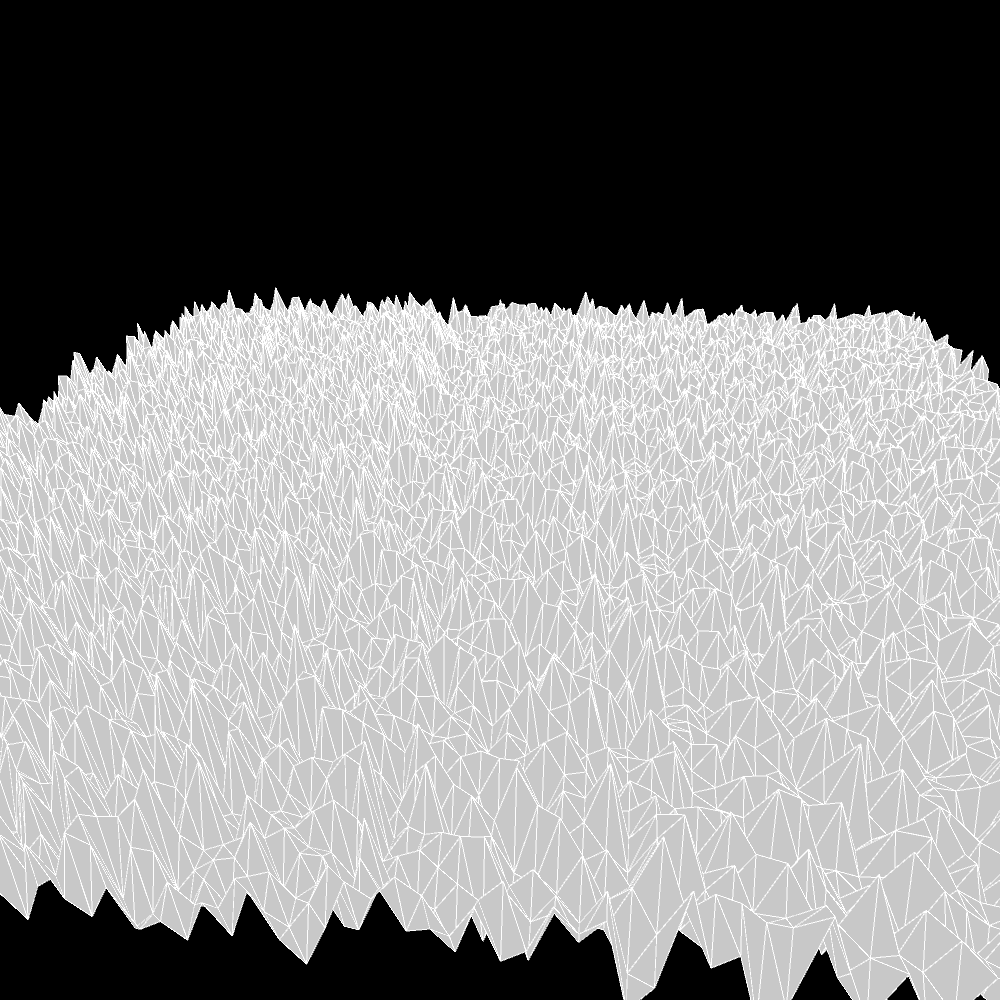
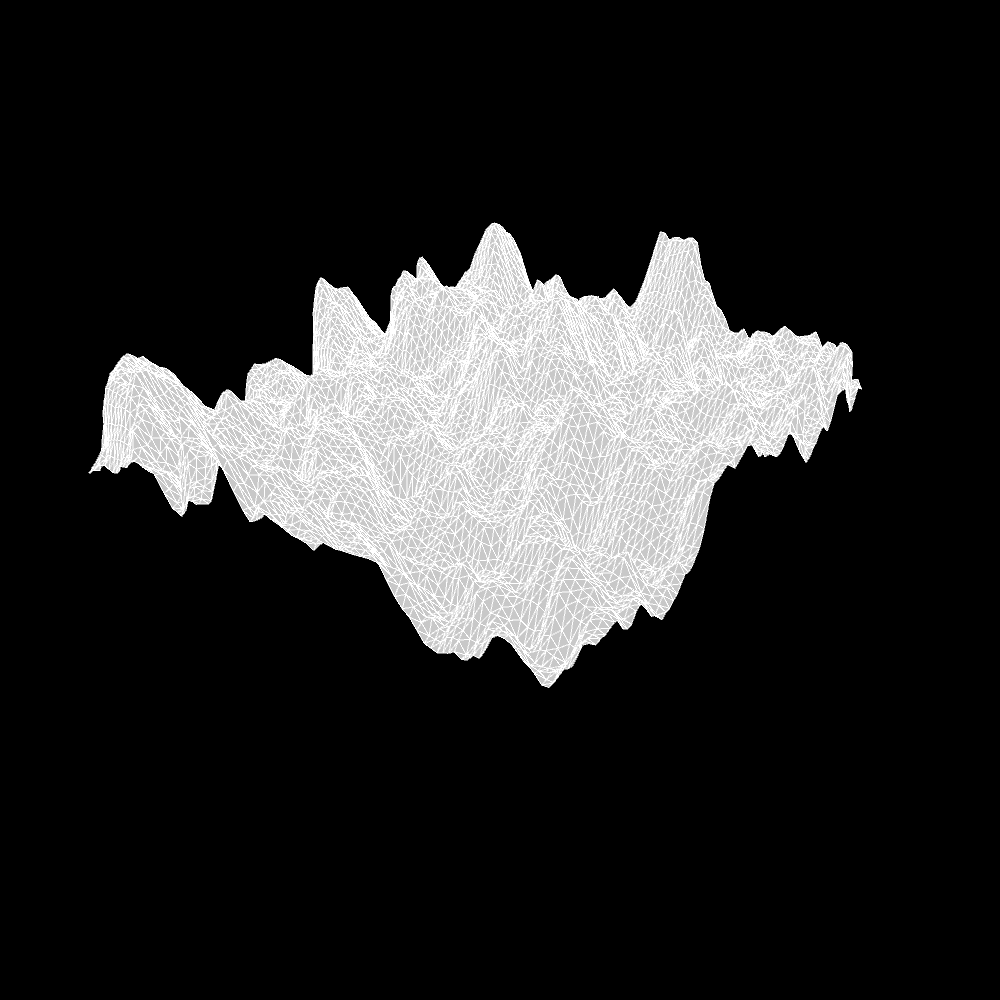
…aaaaaaand it still looks bad.
Worry NOT!
This is simply because our x and y offsets are too large. We’re incrementing the offsets by 1 each time which means that we’re looking at the noise space on a large scale.
Let’s try adding a “noise scale”, and set it to something really low - noiseScale = 0.05
float z = noise(j * noiseScale, i * noiseScale) * maxHeight;

MUCH better (I’ve also increased maxHeight to 200)
We could call it a day already, but I’m going to try to make it a bit more interesting.
Terrain is very rarely as uniform as ours. There are usually larger hills, some smaller ones, and on top of that tiny bumps on the surface. To simulate that we’re going to use multiple different values of noiseScale.
For a very small value (noiseScale = 0.02) we get some nice, large hills.
For a slightly larger value (noiseScale = 0.04) we get some smaller, more chaotic hills.
(Make sure to also change the scaling value maxHeight for each one separately We want to give larger hills more weight, and smaller hills less weight.)
Finally for the largest value (noiseScale = 0.08) we get this.
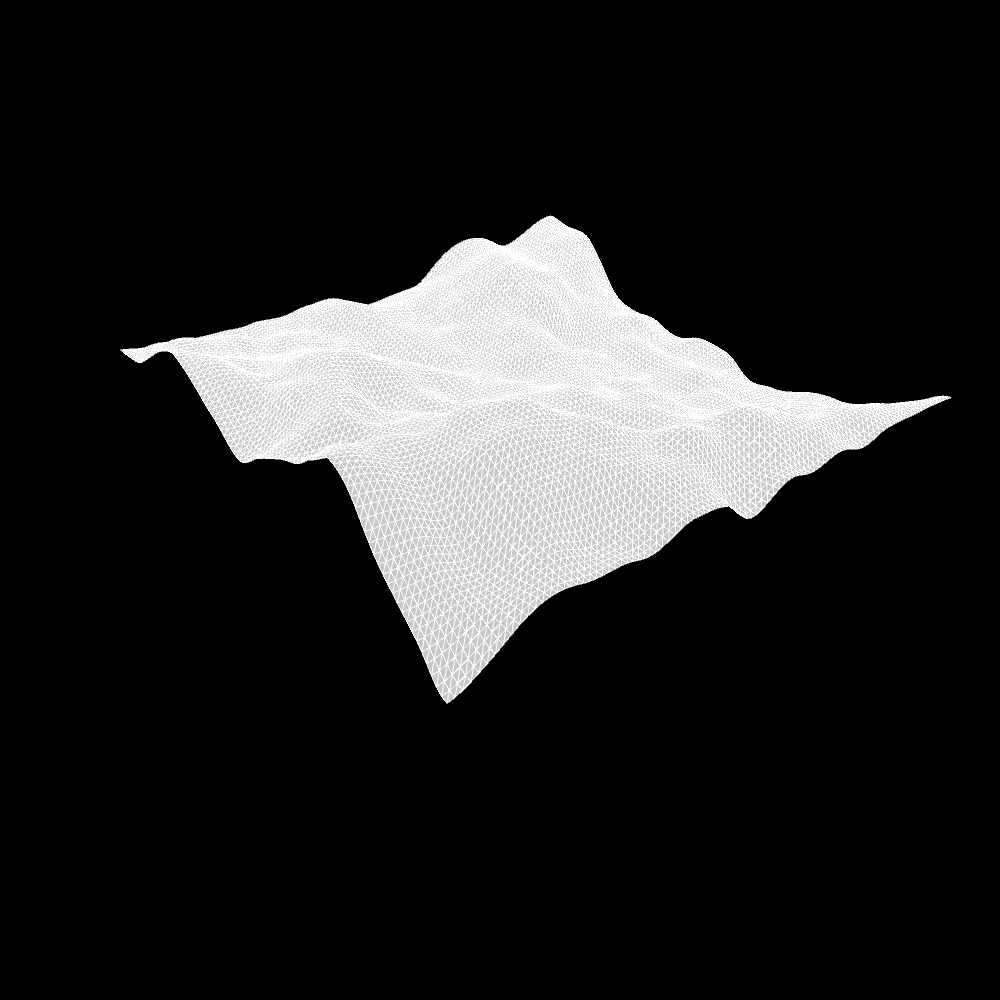
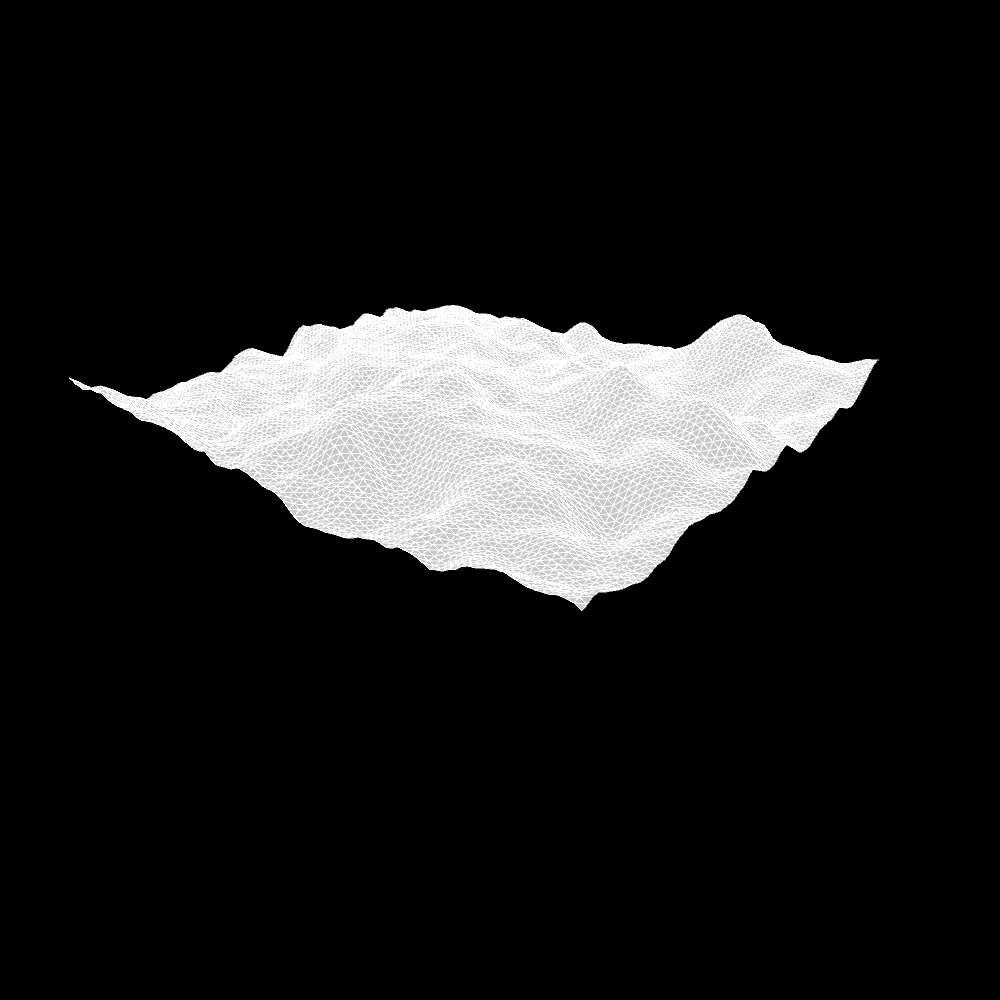
Finally, after adding everything together and scaling appropriately (I’ve replaced noiseScale and maxHeight with separate values for each one)
float z = noise(j * 0.02, i * 0.02) * 400
        + noise(j * 0.04, i * 0.04) * 200
        + noise(j * 0.08, i * 0.08) * 100;
we get this:
Feel free to play around with the values until you like the result. I ended up with these this time:
float z = noise(j * 0.02, i * 0.02) * 200
              + noise(j * 0.04, i * 0.04) * 150
              + noise(j * 0.12, i * 0.12) * 50;
While tuning the value it might also be useful to draw a quad at z=0, which is the minimum height our mesh can have.
quad(0, 0, gridSize, 0, gridSize, gridSize, 0, gridSize);
In the next part we’re going to try and stylize our heightmap/mesh!